Quickstart
This guide adds hashspan to an agent that sends transactions with viem. You need Node.js 22.3 or later.
- Adding it to your own agent? Follow the steps below.
- Starting from scratch? Jump to the complete example: one file, a local chain, no API key.
- Just want to see a trace? The local lab runs the repository’s example agent.
-
Install the packages
Section titled “Install the packages”Terminal window npm install @hashspan/viem @opentelemetry/api viemTerminal window pnpm add @hashspan/viem @opentelemetry/api viemTerminal window yarn add @hashspan/viem @opentelemetry/api viem -
Set up OpenTelemetry
Section titled “Set up OpenTelemetry”hashspan only needs
@opentelemetry/api. Any SDK setup works. If you don’t have one yet, this exports spans over OTLP:Terminal window npm install \@opentelemetry/sdk-trace-node \@opentelemetry/sdk-trace-base \@opentelemetry/exporter-trace-otlp-proto \@opentelemetry/resources \@opentelemetry/semantic-conventionstelemetry.ts import { OTLPTraceExporter } from'@opentelemetry/exporter-trace-otlp-proto';import { resourceFromAttributes } from '@opentelemetry/resources';import { BatchSpanProcessor } from '@opentelemetry/sdk-trace-base';import { NodeTracerProvider } from '@opentelemetry/sdk-trace-node';import { ATTR_SERVICE_NAME } from'@opentelemetry/semantic-conventions';export const provider = new NodeTracerProvider({resource: resourceFromAttributes({[ATTR_SERVICE_NAME]: 'my-agent',}),// OTLPTraceExporter honours OTEL_EXPORTER_OTLP_ENDPOINTspanProcessors: [new BatchSpanProcessor(new OTLPTraceExporter())],});provider.register();Import it first in your entry file, before anything that sends transactions:
import { provider } from './telemetry.js';. -
Extend your viem clients
Section titled “Extend your viem clients”import { createPublicClient, createWalletClient, http } from 'viem';import { baseSepolia } from 'viem/chains';import { withHashspan } from '@hashspan/viem';const hashspan = withHashspan();const chain = baseSepolia;// account: any viem Account, e.g. privateKeyToAccount(process.env.PRIVATE_KEY)const wallet = createWalletClient({ account, chain, transport: http() }).extend(hashspan);const reader = createPublicClient({ chain, transport: http() }).extend(hashspan);// Inside an agent tool, while the framework's span is active:const hash = await wallet.sendTransaction({ to, value }); // send spanawait reader.waitForTransactionReceipt({ hash }); // confirm spanThe confirm span links back to the send span. Reuse the same
withHashspan()result for every client of one agent, so confirmations link to their sends. -
Flush before the process exits
Section titled “Flush before the process exits”A confirm span can end after your code moves on, for example while a revert reason is decoded. Short-lived scripts and serverless functions should flush first:
await hashspan.flush();await provider.shutdown(); -
Open your traces
Section titled “Open your traces”Find your service in your tracing backend and expand a tool span. No backend yet? Start Jaeger locally:
Terminal window docker run --rm -p 16686:16686 -p 4318:4318 \jaegertracing/jaeger:2.21.0Then open localhost:16686.
A complete example on a local chain
Section titled “A complete example on a local chain”One file that sends a transaction on a local Anvil chain and traces it. Put it next to telemetry.ts from step 2, in a project with the packages from steps 1 and 2 and "type": "module" in its package.json:
import { provider } from './telemetry.js';import { trace } from '@opentelemetry/api';import { createPublicClient, createWalletClient, http, parseEther } from 'viem';import { privateKeyToAccount } from 'viem/accounts';import { foundry } from 'viem/chains';import { withHashspan } from '@hashspan/viem';
// Anvil's first test account. Its key is public: never use it on a real chain.const account = privateKeyToAccount(  '0xac0974bec39a17e36ba4a6b4d238ff944bacb478cbed5efcae784d7bf4f2ff80',);const to = '0x70997970C51812dc3A010C7d01b50e0d17dc79C8'; // Anvil's second account
const hashspan = withHashspan({ agent: { name: 'my-agent' } });const wallet = createWalletClient({ account, chain: foundry, transport: http() })  .extend(hashspan);const reader = createPublicClient({ chain: foundry, transport: http() })  .extend(hashspan);
// Stands in for your agent framework's tool span.await trace.getTracer('my-agent').startActiveSpan('execute_tool pay_vendor', async (tool) => {  const hash = await wallet.sendTransaction({ to, value: parseEther('0.01') });  await reader.waitForTransactionReceipt({ hash });  tool.end();});
await hashspan.flush();await provider.shutdown();
Start a chain and Jaeger, then run it:
anvil # terminal 1: local chain on :8545docker run --rm -p 16686:16686 -p 4318:4318 jaegertracing/jaeger:2.21.0 # terminal 2npx tsx agent.ts # terminal 3In Jaeger, pick my-agent: execute_tool pay_vendor has a send 31337 and a confirm 31337 span with blockchain.tx.status = success.
What you should see
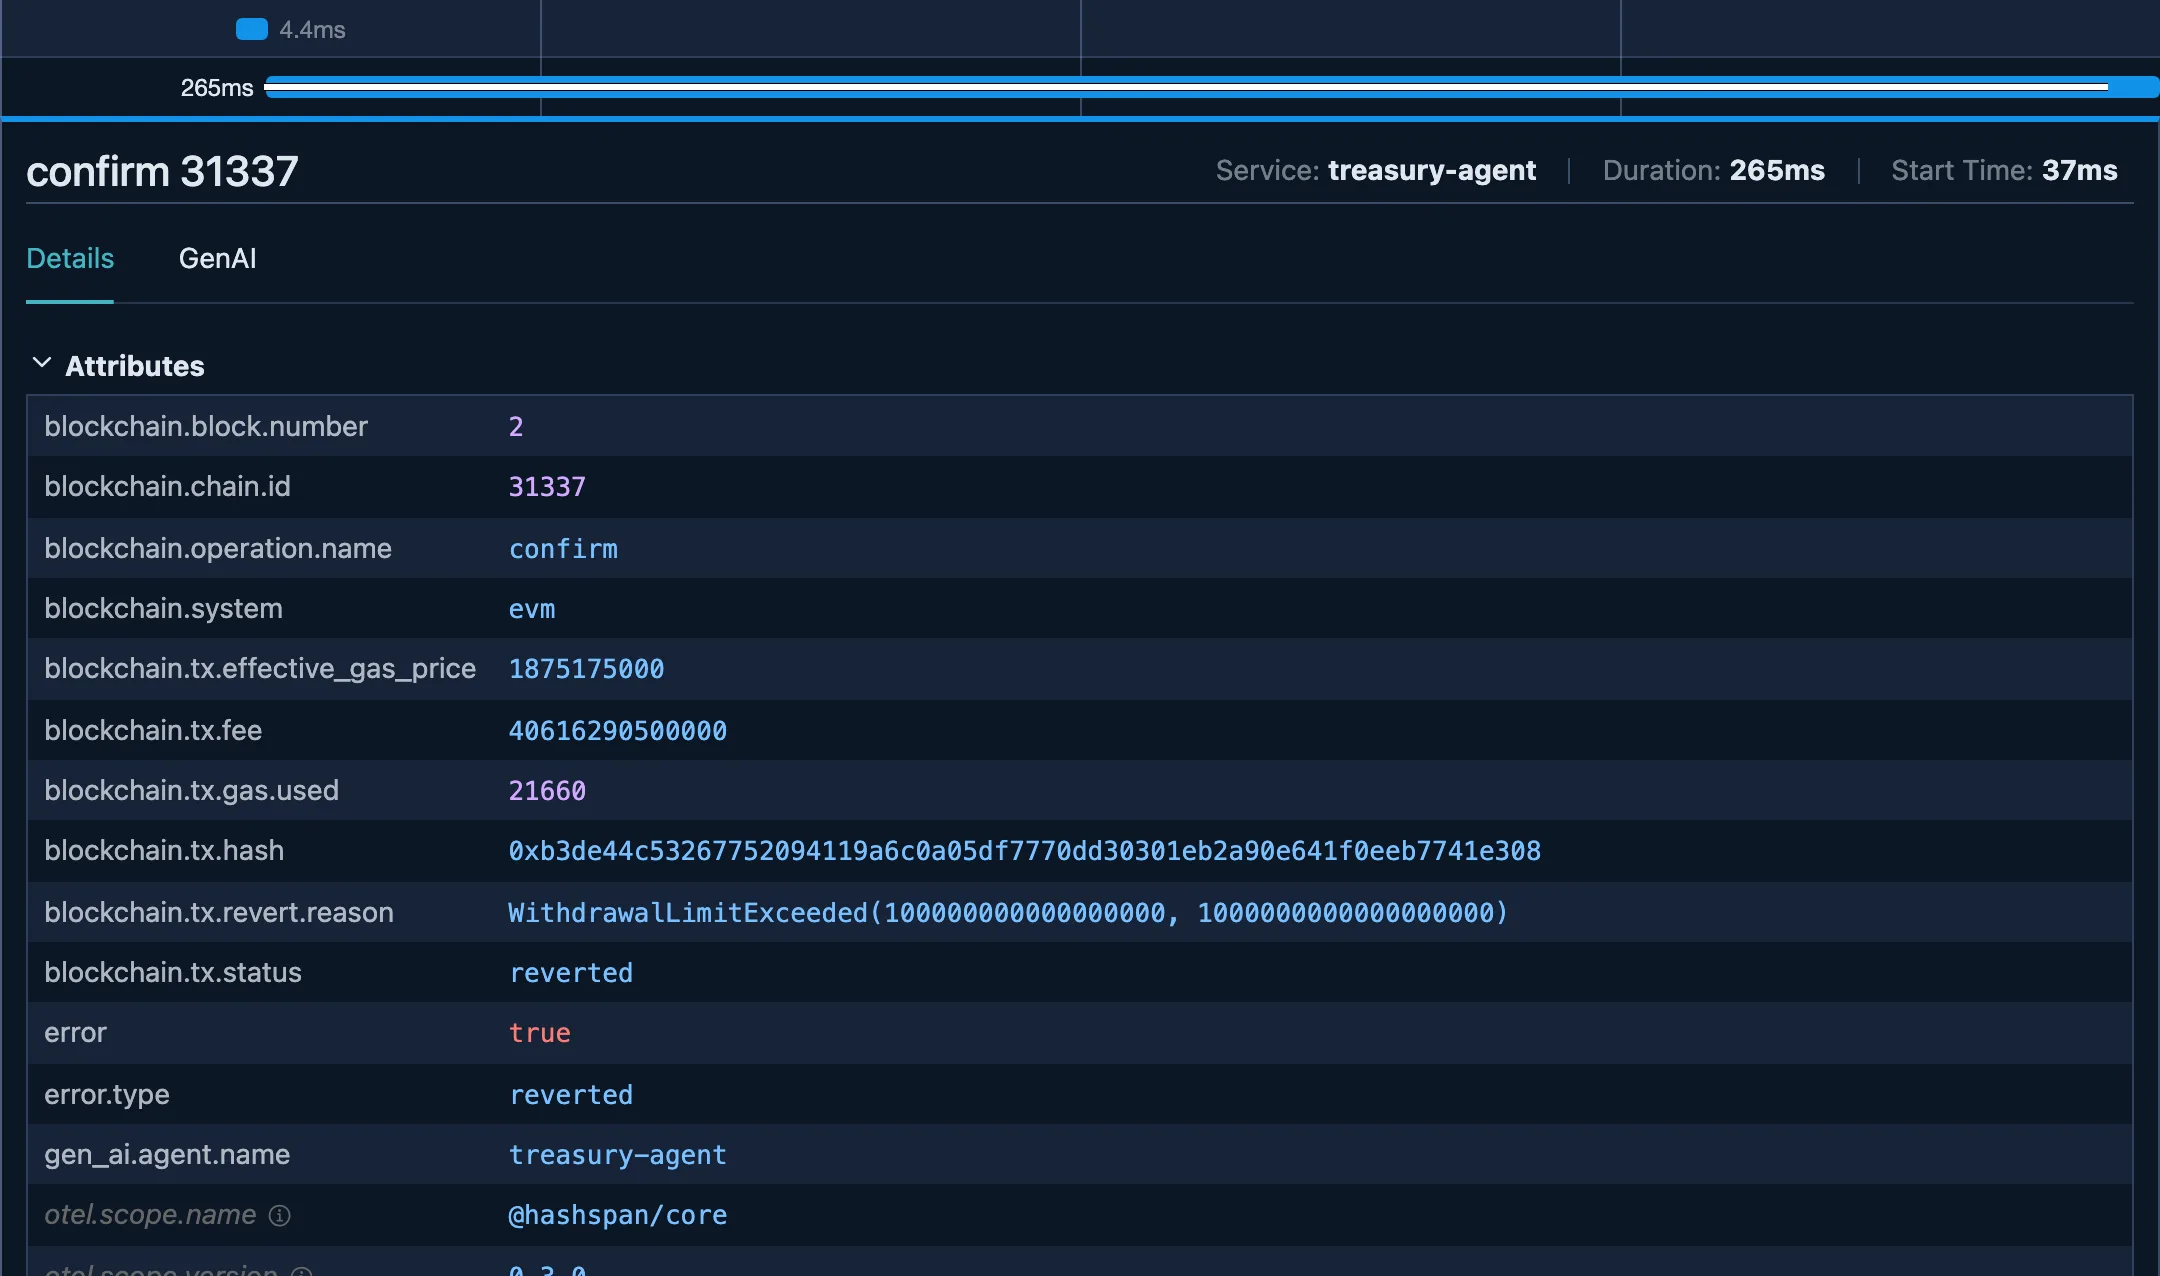
Section titled “What you should see”Each transaction shows up as a send and a confirm span under the tool that sent it. A reverted transaction is marked as an error and carries the decoded reason:
- Run the full example agent with no API key: Local lab.
- Options, background confirmation and replaced transactions: viem adapter.
- Every span and attribute: Semantic conventions.